


When is the best time for introducing solids to a baby?
According to the American Academy of Pediatrics, it is not recommended that babies start solids until between 4 months and 6 months old.
This doesn’t mean you have to give your baby solids at this age, it just means starting solids before this age might not be a good idea for a number of reasons.
When introducing solids, it is also recommended that you introduce one food at a time. This is so that you’ll be able to tell if your baby has any allergies or food sensitivities.
Check for signs such as diarrhea, rashes or vomiting. If any of these symptoms show up after giving baby a new food, you should stop serving it immediately and contact your baby’s doctor.
If you’ve introduced a new food and there are no symptoms after 2-3 days, you can introduce another.
If your baby has reached the recommended age and you’re still not sure if you want to let her eat table food yet, ask yourself these questions to help make a decision:
- Is your baby acting dissatisfied with only milk?
If she is still happy, and content with just milk, you may be able to hold off on the solids for a bit longer.
Baby milk has all the essential nutrients that a baby needs to thrive, so as long as she is getting enough (check with your doctor for weight gain and other indicators that baby is being properly nourished), then there’s no reason you have to begin table food right away.
- Is your baby showing interest in table food?
Naturally, babies want what others have.
This is also true with food. If you have your baby sitting at the table with your family and he starts reaching for your food or any other signs of wanting to eat solids, this is a good sign that he may be ready.
- Can your baby sit upright?
It is important that your baby be able to sit upright to be able to start eating table food. Look into highchairs that will provide a supportive and comfortable seat for baby.
- Can your baby sit with her head unsupported?
This is crucial to being able to start baby on solids. Holding her head upright allows her to be able to eat without choking and may be an indicator that she is ready to swallow solid food.
Supplies for making homemade baby food

So you’ve asked yourself some important questions about your child’s readiness for solids, you’ve talked with her pediatrician, you’ve read a ton of advice, and you’ve come to the conclusion that your baby is ready for solids.
Depending on your approach, you’ll be able to keep your supplies to a minimum and keep the process quick.
Some moms just use whatever the family had for dinner as baby’s dinner, too. They toss it in their baby food blender and puree it to the right consistency and call it done.
Other moms prefer to make a batch of homemade baby food separately from the rest of the family’s. They may steam, chop and puree another set of food and store some for later.
Either approach is fine and will determine what kind of supplies you’ll need.
Use this list as a handy guide to get you started.
The next thing you’ll be asking yourself is what supplies you will need to make homemade baby food?
Making homemade baby food doesn’t have to be complicated. You can have as many or as few supplies as you deem necessary for the job.
We recommend investing in a good quality baby food maker to make the job as easy as possible.
- Baby food blender (if you’ll only need to puree or blend food that has already been prepared)
- Baby food steamer
- Refrigerator storage containers
- Freezer storage containers
- Reusable baby food pouches
- Cutting board
- Knife for cutting food
- Baby food masher (if food will be mashed in a separate container)
 How to choose a baby food maker

Since you’re looking to prepare homemade baby food, one of the most important things you’ll need is to have a good, high-quality baby food maker. These machines have come a long way and many include lots of bells and whistles.
While it’s good to have options, you also want to be sure the baby food maker you choose functions the way you need it to and isn’t just a fancy piece of equipment that takes up space.
There are several different kinds of baby food makers and each mom will find that her circumstances may dictate that she needs something different from the next mom.
Among the kinds of baby food processors, you’ll find the traditional electric units which can have powerful motors and help save time when it comes to chopping and pureeing.
Electric baby food makers can come as just blenders or as all-in-one machines that grind, cook and puree all in one unit.
There are also manual units like this OXO Tot Food Masher that are great if you only have a small portion of food that needs to be mashed or pureed.
It may actually be easier to use a manual baby food masher by hand than to use a larger machine that has to be taken apart and washed afterward.
Another way to make homemade baby food is to not use a machine at all, but instead to go the route of using a fork or spoon to mash baby’s food up.
If you’re considering a baby food maker, ask yourself these questions:
What kind of features does it have?
Are the features all useful and worth paying for?
Is the baby food maker easy to use or will it require a lot of complicated steps to operate?
Is it made from safe, durable material?
Is the price reasonable compared to what it can do?
Baby food consistency
While homemade baby food is easy enough to make, you also want to be sure you are making it correctly for the stage that your baby needs.
A baby that is just starting solids will need a different consistency than a baby that has been eating solids for months.
Being too thick can pose a choking hazard to babies so be sure to use more liquids when needed.


Here are two examples of first and second stage pureed baby food.
You’ll notice that the baby food in the first picture is thinner in consistency while the second picture is slightly thicker.
As babies get older and eat more food, they learn how to swallow thicker food until they gradually get to solid, non-pureed food.
First foods for baby
According to the American Academy of Pediatrics, you can introduce baby to solid food between 4 and 6 months old. If he has been exclusively breastfed or formula fed up until this point, he will benefit from the nutrient-rich vitamins and minerals in healthy, fresh food.
Traditionally, many parents have chosen to give their babies a rice or singe-grain baby cereal as their baby’s first food. It may surprise you to know that these are not necessarily recommended first foods.
Mom tip: When introducing solid food, expose baby to a wide variety of healthy foods, textures and flavors!
The bottom line is, for more vitamins and nutrients, don’t be afraid to try colorful vegetables and fruits to get her use to eating a healthy, well-rounded diet.
Baby food NO-NOs!
While it is recommended to expose babies to a variety of tastes and textures, there are still some foods you should not give your baby.
Just like adults, it is possible to give a baby too much sugar.
It’s best to stay away from most processed foods because they contain a lot of sugar and can put your baby at risk for health problems like obesity.
Stick with fresh fruits and vegetables as much as possible when making homemade baby food to give your baby a healthy start.
Another food that babies should never be given is honey. Although it is a natural food, pediatricians usually recommend that babies under 12 months not eat it.
There are bacterial spores in honey that are harmless to adults, but can put babies at risk for botulism.
It’s best to wait until your baby is over a year before introducing this sweet treat.
How to make baby food
Ready to start making your baby’s food at home?
Use these easy steps to guide you through the process to delicious homemade baby food in no time.
- BUY. Organic food is best, but any fresh foods will be a good addition to baby’s diet.
- PREP. Scrub and rinse fruits and vegetables in running water. If you desire, you can also trim fat from any meat.
- CLEAN. Make sure hands and all prep areas are clean.
- COOK. Cook or steam food according to instructions. Most baby food makers will come with a guide to tell you how long to cook or steam different food.
- PUREE. -Once it’s done cooking, mash the baby food into a puree or if using a baby food maker, let it puree the food after cooking.
- COOL. Let the baby food cool so it won’t be too hot.
- FEED. -Feed your baby a delicious meal.
- STORE. If baby food was made in bulk, label and store the remainder in single-serve airtight refrigerator or freezer safe containers.
How long can baby food be stored?
The U.S. Food and Drug Administration recommends storing homemade baby food in the refrigerator for no longer than 48 hours and in the freezer for up to 4 months. This is to keep baby’s exposure to bacteria to a minimum.
The important thing to remember when storing homemade baby food is to make sure it is sealed properly. You should use air-tight containers that are made for the area that they will be stored.
Some containers only work for storing food in refrigerators while others can be used for refrigerators or freezers. Check your containers to make sure you have the kind you need for your storage needs.
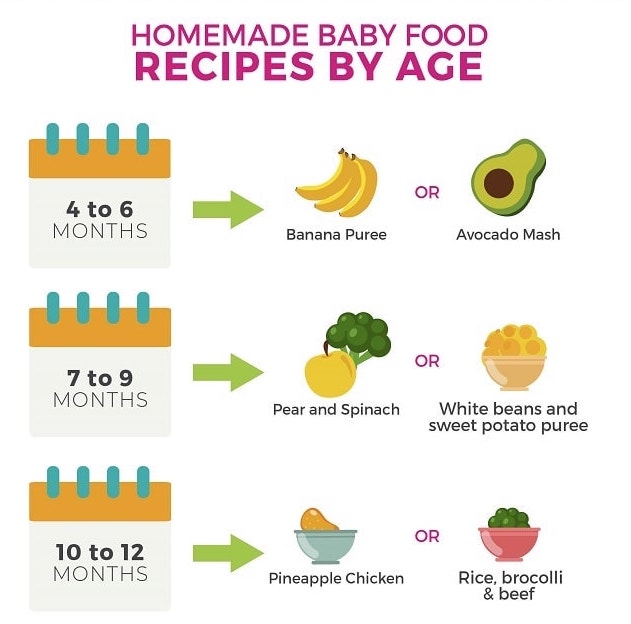
Homemade baby food recipes by age
Now that you know how to prepare, make and store your baby’s food at home, try these baby food recipes for babies between 4 and 12 months.
4-6 Months:
- Peach puree
- Banana mash
- Blueberry puree
- Butternut squash
- Green bean puree
- Pea puree
- Carrot puree
- Avocado mash
- Apple puree
- Pear puree
7-9 Months:
- Avocado and banana
- Pear and spinach
- Mango and kale puree
- Sweet potato and cauliflower
- Apple and chicken puree
- Apple, raspberry oatmeal
- Papaya and Kiwi oatmeal
- Peach and chicken dinner
- Spinach, mango, banana puree
- Blueberry and apple oatmeal
- Green bean and kiwi puree
- Strawberry mango puree
- Apricot and papaya puree
- White beans and sweet potato puree
- Butternut squash and pumpkin puree
10-12 Months:
- Salmon, brown rice and peas
- Bananas with almond butter
- Scrambled eggs and avocado
- Quinoa, bean and cheese medley
- Pork and apples
- Pineapple chicken
- Chicken, apple and corn mash
- Avocado mash
- Rice, broccoli and beef
- White beans, sweet potatoes and chicken
